
Crafting a Stylish Bow Brooch with Fancy Buttons
Ready to add a dash of fun and flair to your outfits? Let's get crafty and whip up a super cool bow brooch with some awesome fancy buttons.
How to create this eye-catching accessory? It's super simple, really creative, and totally stylish. You'll be amazed at how this little brooch can transform your look, making it more elegant and charming. So, grab your materials, and let's get started on this fun DIY project that's sure to make your friends go "Wow!
Choosing the Perfect Fancy Buttons
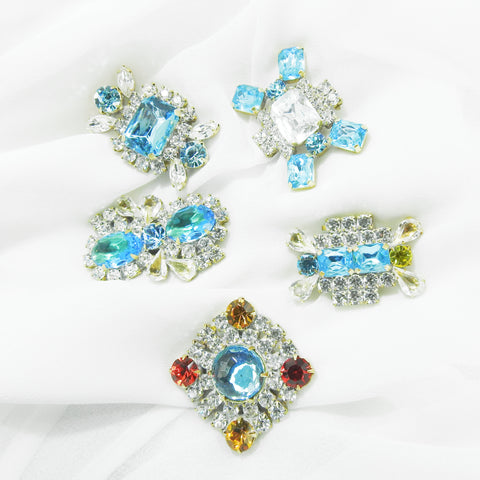
When selecting fancy buttons for your bow brooch, consider the size, shape, and color. Opt for buttons that will complement your outfit or add a pop of contrasting color. Look for unique designs or intricate details to make your brooch stand out.
Keep in mind the material of the button as well - from metallic finishes to sparkling gems, choose a button that reflects your personal style. Mixing different types of buttons can also create a more dynamic and visually appealing brooch. Experiment with various combinations until you find the perfect match for your design vision.
In conclusion, don't be afraid to get creative with your choice of fancy buttons. They are an essential element in crafting a stylish bow brooch that is uniquely yours. Embellish it with flair and personality by carefully selecting buttons that speak to you and enhance the overall look of your accessory.
Selecting the Right Fabric for Your Bow Brooch
When choosing fabric for your bow brooch, consider the texture and weight of the material. Opt for fabrics like silk or velvet for a luxurious look, while cotton or linen can give a more casual vibe.
Additionally, think about the color and pattern of the fabric to complement your fancy button choice. A solid color can make a statement with an intricate button design, while a patterned fabric can add depth to a simpler button style.
Experiment with different fabrics to see how they drape and hold shape when creating your bow brooch. Don't be afraid to mix and match textures for added visual interest in your final accessory creation.
Tools and Materials You'll Need
- Needle and thread: Ensure you have a sturdy needle and matching thread to secure the buttons in place with precision.
- Fancy buttons: Choose an assortment of stylish buttons that will add flair to your bow brooch. Mix and match colors, shapes, and sizes for a unique look.
- Fabric or ribbon: Select a piece of fabric or ribbon that complements your button selection. This will serve as the base of your bow brooch.
Gather these essential tools and materials before beginning your craft project to ensure a smooth and enjoyable DIY experience. Let's get ready to create a one-of-a-kind accessory that reflects your personal style!
Step-by-Step Guide to Crafting the Bow

- Gather Your Materials: To start crafting your stylish bow brooch, gather fancy buttons of different shapes and sizes, a piece of felt or fabric in a color that complements your buttons, a needle and thread, scissors, and a brooch pin.
- Create the Bow Shape: Cut out two identical rectangles from your felt or fabric. Fold each rectangle in half lengthwise to form loops, then secure the ends together with stitching. Trim any excess material for clean edges.
- Assemble Your Brooch: Arrange your fancy buttons on one side of the bow shape to create an eye-catching design. Once you're satisfied with the arrangement, carefully stitch each button onto the fabric using a matching thread.
- Attach the Brooch Pin: Finally, attach a brooch pin on the backside of your bow by stitching it securely in place. Make sure it is centered and strong enough to hold up when worn as an accessory.
Embellishing Your Brooch with Fancy Buttons
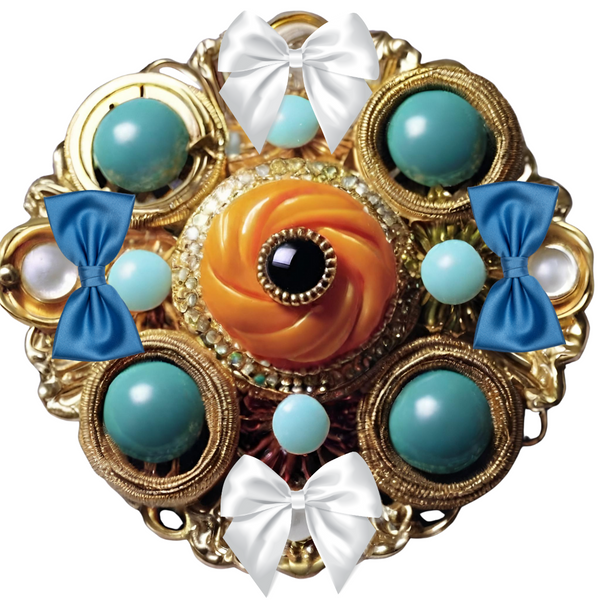
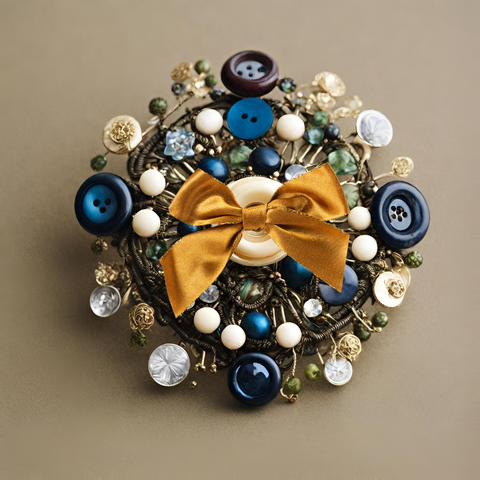
Enhance the charm of your bow brooch by adding a touch of sophistication with fancy buttons. Opt for buttons in various shapes, sizes, and colors to create a unique and eye-catching design.
- Mix and Match: Experiment with combining different types of buttons to add depth and dimension to your brooch.
- Placement is Key: Consider placing the buttons strategically on your bow brooch to achieve a balanced and visually appealing arrangement.
- Sew or Glue: Depending on your preference, use needle and thread or a strong adhesive to securely attach the buttons onto your brooch.
Elevate your DIY creation by incorporating fancy buttons that reflect your personal style and elevate the overall aesthetic appeal of your stylish bow brooch.
Finishing Touches: Adding a Pin Back
- Carefully glue a pin back to the back of your bow brooch using strong jewelry adhesive.
- Make sure the pin is centered and evenly aligned with the back of the bow.
- Allow the adhesive to dry completely before wearing your stylish new accessory.
With this final step, your DIY bow brooch is now complete and ready to be added to any outfit for a touch of elegance and charm. Enjoy showing off your creativity and personal style with this unique piece that you crafted yourself!
How can you incorporate bow brooches into your wardrobe for different occasions?
Incorporating Bow Brooches into Your Wardrobe
Casual Occasions:
- Add a touch of whimsy to your everyday outfit by pinning a bow brooch onto a denim jacket or a cozy sweater.
- Pairing it with jeans and sneakers will give you that effortlessly chic look for running errands or grabbing coffee with friends.
Professional Events:
- Elevate your office attire by wearing a sleek bow brooch on the lapel of your blazer or cardigan.
- Choose one in a classic color like black, navy, or burgundy to exude sophistication and polish during meetings and presentations.
Formal Gatherings:
- Make a statement at special events such as weddings or galas by selecting an ornate bow brooch with intricate details.
- Opt for metallic tones like gold or silver to add glamour and elegance to your evening gown ensemble.
What are some creative ways to use different types of buttons in making brooches?
Creative Ways to Use Different Types of Buttons in Making Brooches
- Mix and Match: Experiment with combining different sizes, shapes, and colors of buttons to create a unique and striking brooch design.
- Layering: Stack smaller buttons on top of larger ones or overlap them diagonally for added dimension and visual interest.
- Textural Contrast: Pair smooth, shiny buttons with textured or matte ones to create a dynamic look that catches the eye.
How can you create a matching set of bow accessories (like earrings, a necklace, etc.)?
Creating a Matching Set of Bow Accessories
To create a matching set of bow accessories like earrings, a necklace, or bracelet to complement your stylish bow brooch, start by choosing the same type and color of fancy buttons used in the brooch. This will help tie all the pieces together for a cohesive look.
Next, consider using smaller versions of the buttons for earrings or incorporating them into a pendant for a necklace. You can also use ribbon or fabric that matches the material used in the brooch to craft additional accessories such as hair clips or headbands.
Experiment with different designs and styles to find what works best for each accessory while still maintaining a unified theme across all pieces. Don't be afraid to mix and match materials to add texture and interest to your overall ensemble.
For more detailed instructions and inspiration, you can check out this lovely blog: cutoutandkeep.net
Sewing is a fantastic way to express your creativity and make unique items. How about exploring some of these sewing ideas?
Whether you're into crafting your own pieces or just love drooling over gorgeous designs, a big warm welcome to our blog all about jewelry inspiration!