If you're looking for a fun, easy, and versatile sewing project for the fall season, a skirt with an elastic waistband is a perfect choice. This classic wardrobe staple can be dressed up or down and styled with cozy sweaters, boots, or tights. Whether you're new to sewing or looking for a quick project, this tutorial will guide you step by step through the process of making a simple, fall-friendly skirt. Let’s get started!
Materials You’ll Need:
- Fabric: 1.5–2 yards of fall-appropriate fabric (cotton, flannel, jersey, or wool blends work great)
- Elastic: 1-inch wide elastic (the length should fit your waist measurement)
- Sewing machine and coordinating thread
- Pins and fabric scissors
- Measuring tape
- Safety pin
Step 1: Choose Your Fabric
Fall fabrics tend to be a bit heavier to keep you warm, so look for something that suits the season. Flannel, corduroy, or wool blends work well for colder months, while cotton or jersey can give you a lighter, flowy feel. Choose colors and patterns that reflect fall vibes—think earthy tones like rust, mustard, olive, burgundy, or plaids and florals that evoke the season.
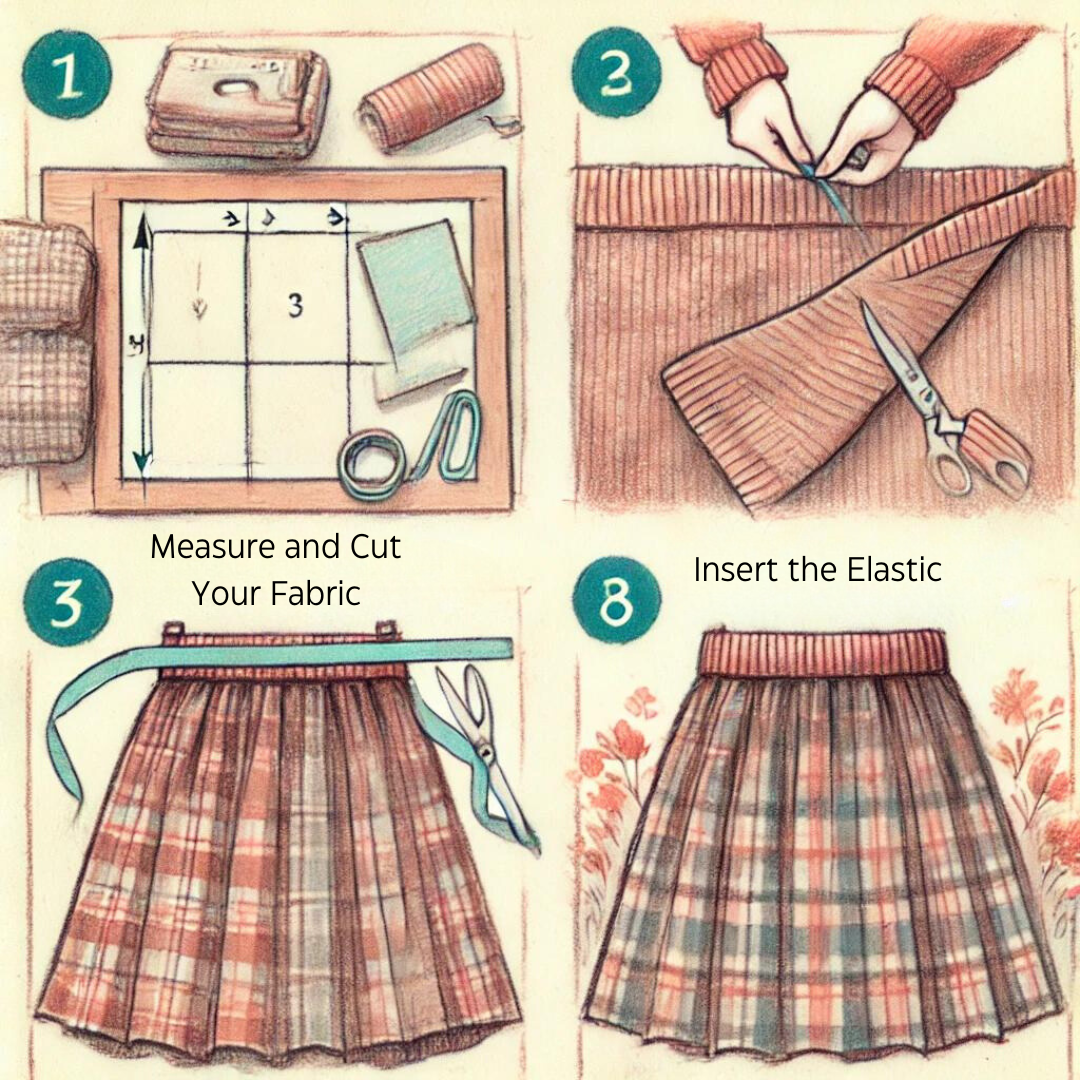
Step 2: Measure and Cut Your Fabric
1. Measure your waist: This will be the length of the elastic.
2. Decide on the length of your skirt: For a mid-length skirt, you’ll want around 24–28 inches. Add 2 inches for the waistband and 1 inch for the hem.
3. Cut a rectangle: The width should be 1.5 to 2 times the measurement of your waist (for gathering) and the length should be the desired skirt length plus the waistband and hem allowances.
For example, if your waist is 30 inches, cut your fabric about 45-60 inches wide depending on how full you want the skirt. If you want a 25-inch skirt, cut the fabric length to 28 inches (adding 3 inches for the waistband and hem).
Step 3: Sew the Side Seam
Fold your fabric in half, right sides facing each other, so that the shorter edges meet. Pin along this edge and sew with a ½ inch seam allowance. You’ll now have a fabric tube that will become your skirt.
Step 4: Create the Waistband Casing
1. Press the top edge: Fold down the top edge of your fabric by ¼ inch and press with an iron. This will prevent the raw edge from fraying.
2. Fold again: Fold it down 1.5 inches to create a casing for the elastic. Press this fold as well.
3. Sew the waistband: Stitch around the folded edge close to the bottom, leaving a 2-inch gap to insert the elastic.
Step 5: Insert the Elastic
1. Attach a safety pin to one end of the elastic and thread it through the waistband casing.
2. Once the elastic is completely threaded through, overlap the ends by about an inch and sew them together with a zig-zag stitch for security.
3. Distribute the fabric evenly around the elastic and stitch the opening in the waistband closed.
Step 6: Hem the Skirt
To finish the hem:
1. Fold the bottom edge up by ½ inch and press it with an iron.
2. Fold it up again by another ½ inch to enclose the raw edge, then press.
3. Sew around the hem using a straight stitch to secure it.
Step 7: Optional Finishing Touches
For extra fall flair, you can:
- Add pockets: Cut two pocket pieces (about 6 x 8 inches) and sew them into the side seam.
- Decorate the hem: Use decorative stitching or a contrasting fabric for a fun, autumn-inspired border.
Step 8: Styling Your New Skirt
Now that you’ve made a cozy and stylish fall skirt, the fun part is styling it! Pair it with chunky sweaters, a leather jacket, tights, and ankle boots for a perfect autumn look. You can even experiment with layering—try a long coat or a blanket scarf for extra warmth and texture.
Conclusion
Making a skirt with an elastic waistband is a beginner-friendly sewing project that’s also practical and stylish. With the right fabric and some easy-to-follow steps, you’ll have a custom-made skirt perfect for fall weather. Happy sewing, and enjoy the compliments on your new handmade wardrobe piece!